About Natasha Cooke

Media Production | Level 2 | Film Production| Digital Media |

Audience Feedback: Website Survey

After having finished my final website design, I created a short survey using SurveyMonkey to get feedback from my target audience. I posted this on Facebook and Twitter in order to gain a quick response from as many respondents as possible. Unfortunately there were fewer responses than would have been needed, however this has still given me a rough indication of how effective my website is.

The survey results can be found here.

Looking at these results, it is evident that there are certain strengths and weaknesses of my website. All the respondents answered that the colours were either appealing or somewhat appealing, which shows that this was a good choice but could possibly still be improved. The website navigation is suitable and does not need to be changed as users responded that it was either extremely easy or very easy to use. In terms of the font, it was seen as easy to read and ‘somewhat’ easy to read, which suggests that perhaps using a different typeface would be more appropriate to ensure that the website is legible. There is a clear indication that the website is not as visually appealing as it should be, which suggests that there is room for improvement in this area. To refine this, I could probably change some of the colours on each page for a more interesting experience, as well as some of the spacing between certain elements so that there is less white space. It is clear to see that the information is easy to understand which means that this section could probably be left unaltered. There were mixed results for how suitable the website images are, which suggests that I could try multiple different images and gain more feedback until I get an all-positive response from the users. There were also mixed responses when asked if the website would meet the user’s needs. The majority of people responded ‘somewhat’ which means that perhaps there are features which need to be added in order for the user to have a full experience. If I were to re-design the website I would add more features before asking a question in the survey with regards to each specific area. This would then allow me to analyse which features are useful and which ones are not. Finally, the majority of respondents answered that the website is user-friendly, suggesting that this is one strength of the website which should stay the way it is.

Looking at the comments, two people answered “it is little bit boring website and very simple, you need to make more visual appealing and make more colorful to bring potential customers who will meet their needs” and “More colour variety and changes in layout”. These comments suggest that there are definitely areas to be worked on in terms of colour, font, layout etc. Perhaps using different colours for each page would make the website more visually appealing, however the composition would stay the same in order for the overall layout to be consistent in style.


Website Design

After having created my mobile application, I then moved on to creating a prototype for the website using Adobe Muse. Due to time constraints (and a large amount of duplicate design) only the customer version is displayed here, but the same principles would be applied to the establishment version. (Some pages are zoomed out due to their size).

welcome

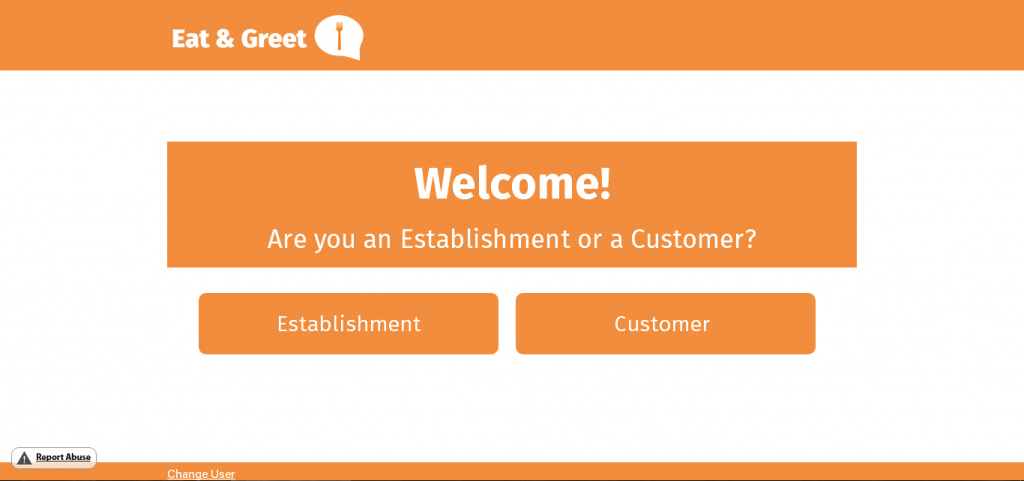
This is the ‘Welcome’ page which users will first see when they visit the site’s URL. As for font and colour I have made sure that they are consistent along with the mobile design, so that there would be familiarity between the two. The two buttons below would link to each version so that it is easy for the user to navigate to the correct site. The only criticism I have of this page in particular is that it is too bland- originally I wanted this to be as clear as possible hence the minimal design, however I feel that some images or pattern behind the orange boxes would make the website more visually appealing and hold the user’s interest. Similarly to the mobile design, the logo is consistently displayed at the top (in this case, the top left due to the composition of a desktop layout) and links to the home page after the user profile is selected.

home

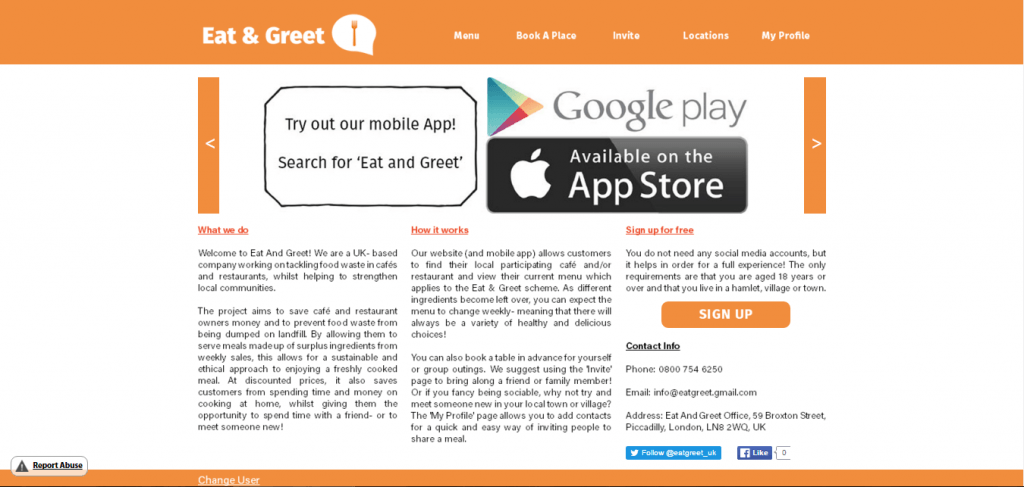
This is the customer home page. Although I have made the design responsive, there is still an issue with the width of each page not filling up the entirety of the screen. If I were to improve this in a future design I would make sure that the website fits the width of the screen no matter what device it is being accessed from. Although it cannot be seen in this still image, the top image automatically slides into a different image for a variety of design, which can also be changed manually by clicking on the left and right arrows. The image shown in this screenshot is an advertisement for the mobile app- I have taken this from seeing similar adverts on other webpages.

Although I have tried to stick to the design from the wireframe template, I made some changes to the layout which I felt were more suitable in terms of composition and ease of access (such as the menu pages being on the top right, for example). The contact information is on this page as not only did I not create a separate page for this, but I felt that it would be beneficial for the user to be able to access this information quickly. There is also an option for a Facebook like and Twitter follow so that audience members can keep up-to-date with the latest information without having to visit the website itself. The ‘Sign Up’ button would link to a form in which new members can fill out and create a free account in order to use the service. Although it is not shown here, it would be sensible to add an optional ‘Log In’ section rather than the user having to visit the Profile Settings under the ‘My Profile’ page. The bottom left corner says ‘Change User’. This was added as a hyperlink to the welcome page if the user accidentally clicked on the wrong button.

menu

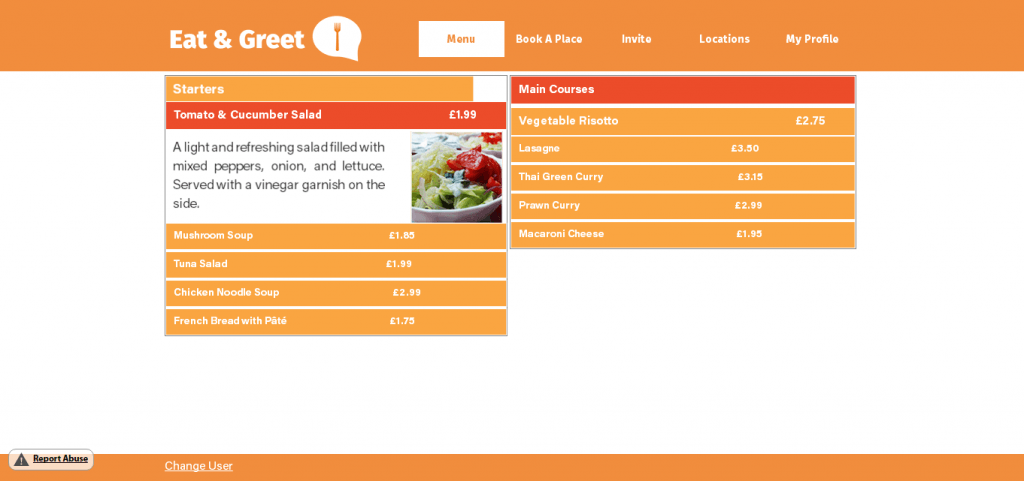
The Menu page (although only displayed two core menus) is made using widgets in Adobe Muse. I used an Accordion panel as this was the most visually appropriate way to display the menu items without it taking up too much space. With this feature it could display the title and prices of all the menu items at once, however if the customer wished to see the item in more detail they could simply click on the box and see the information displayed. When one item is opened the other closes, meaning that the user would not have to worry about scrolling through pages of text just to navigate to the item they want.

book

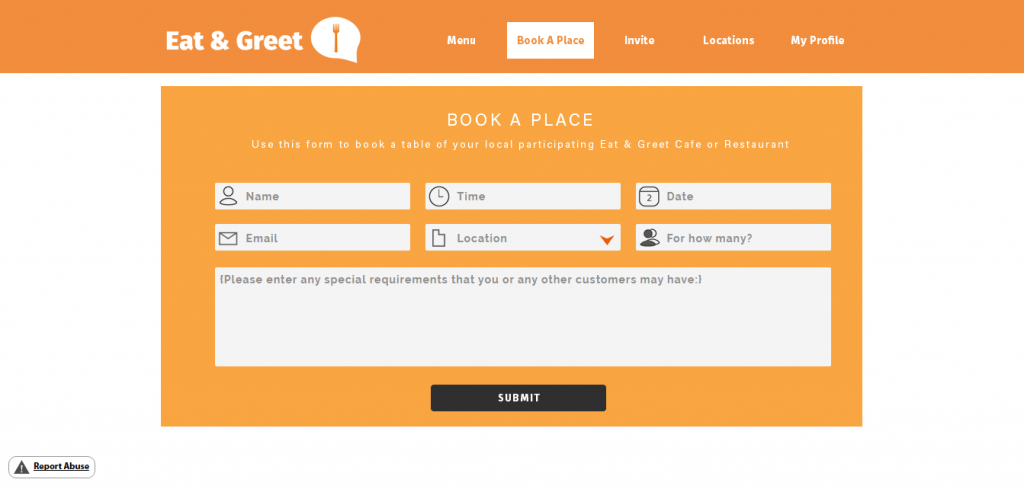
This is the ‘Book A Place’ section. I used an external Adobe Muse widget and modified it for the purpose of my project to build this. This is the page which varies the most from its mobile counterpart, however it would still integrate a drop-down menu for the list of locations whereas the other features can be typed. If this were to be fully functional the system would be able to detect whether the customer entered an invalid value (for example, a time when that particular restaurant was not open or if the email address is invalid) and display an error message as appropriate. They can then submit this information to the establishment using the button below.

invite

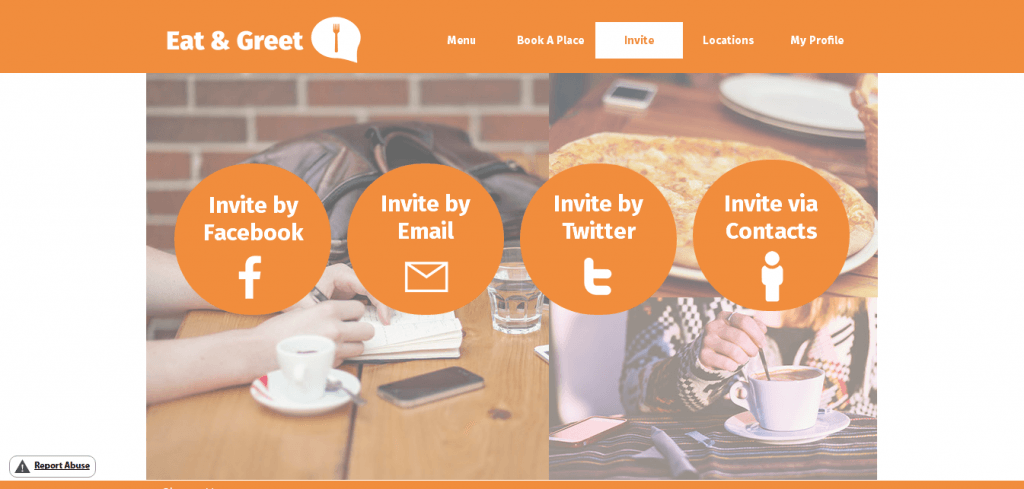
The ‘Invite’ page follows the same formula as the mobile version, however here it is broken down into clearly defined buttons. Icons have also been added to allow for a more visual experience, as well as to make it more obvious what each title means. Each button would link to a separate page in the same way as the mobile app would do, allowing the user to send an invitation to their friends, family, etc.

locations


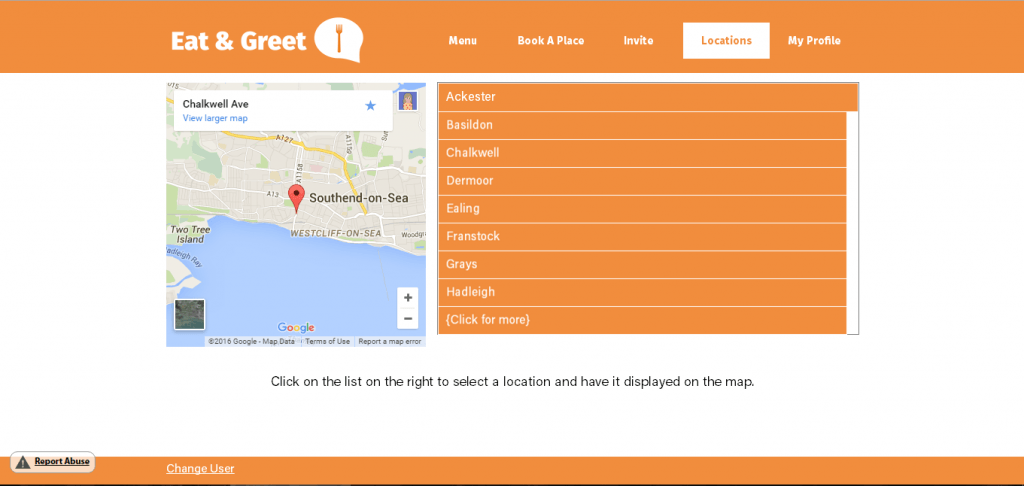
The ‘Locations’ page works in the same way as the mobile version, however I have used another Accordion panel to list the locations of each cafe/restaurant. If this were fully functional the map address would change when each location is clicked, showing the user where it is sited. Although there is no ‘enter Postcode’ section as on the mobile app, the space on the desktop version would allow for the user to utilise the Google Map to type in their address and have it automatically display where their nearest Eat & Greet establishment is.

profile

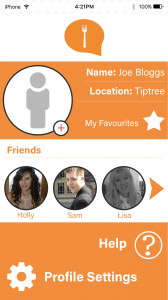
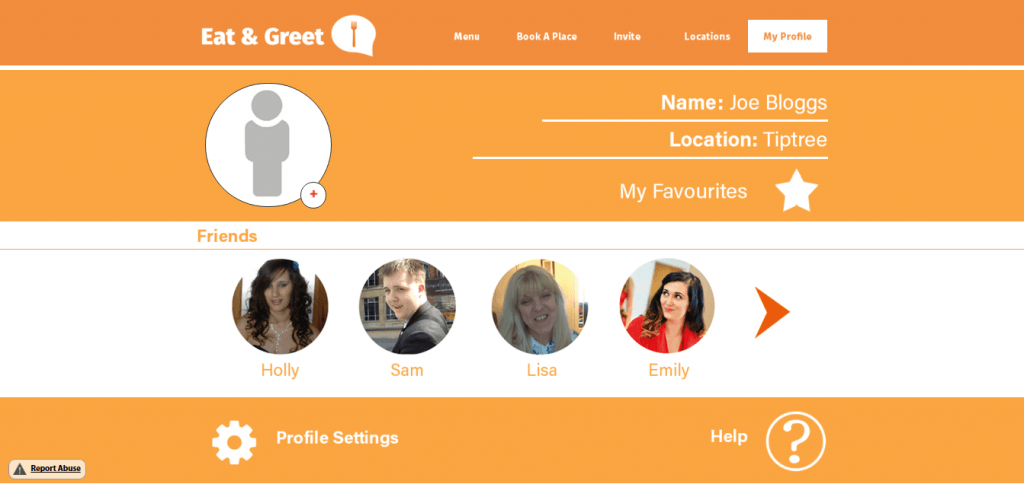
Finally, the ‘My Profile’ page is almost identical to the mobile app version, with slight adjustments to fit a desktop screen. The star icon would be selected should the user wish to view their favourite menu items on a separate page; above that shows their full name and location. When hovered over the plus icon would let the user add or change their profile picture should they wish to use one. As with the mobile app, the profile settings and help functions are displayed below as well as the orange arrow to give the user control over seeing their whole friends list.

Website link: http://eat-and-greet.businesscatalyst.com/

Mobile App: Re-design

After some brief feedback on my original mobile app design, I had made some slight edits as shown below:

new screens 1

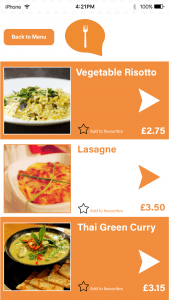
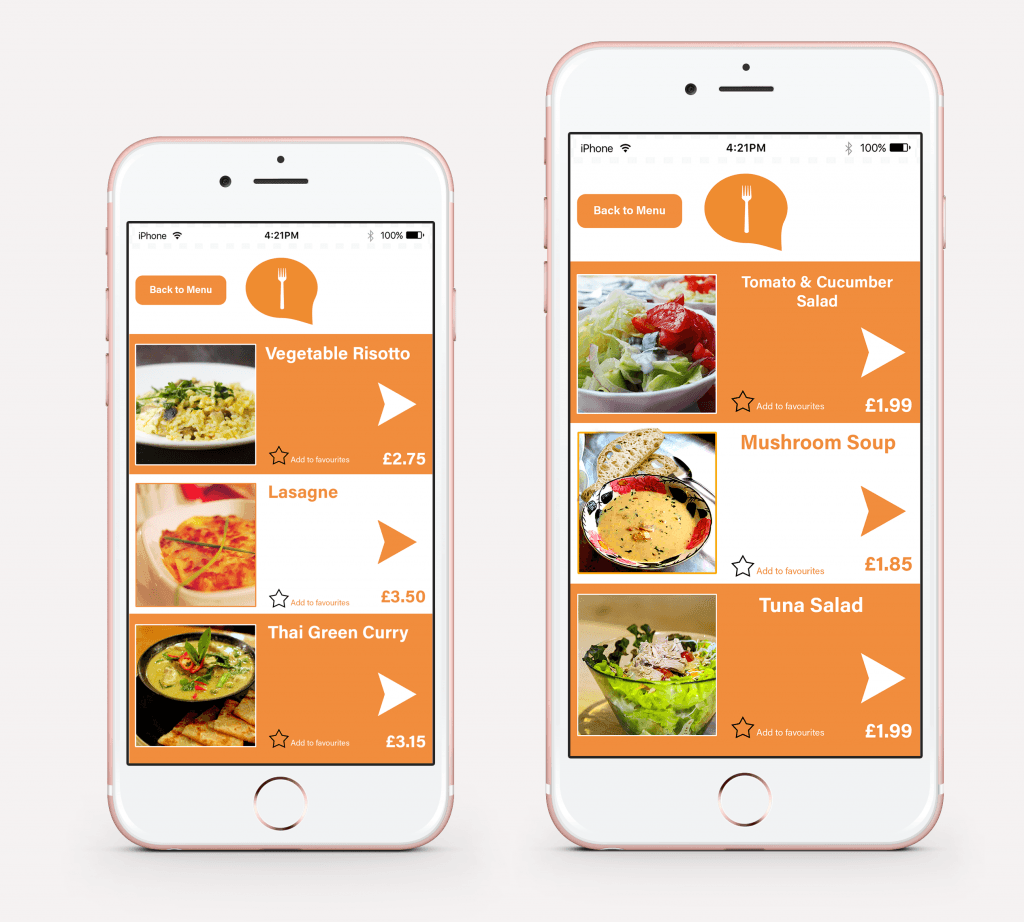
The original text had the description of the meal underneath its title, however I was told that this made it somewhat difficult to read and was unclear to the audience. I have altered this by adding a simple arrow to indicate that there is more information when it is pressed. In theory this would then lead on to another page which has the description of the meal with larger text that would fill up the whole screen. It would also be sensible to have a ‘back’ button so that the user could navigate back to the menu page.


new screens 2

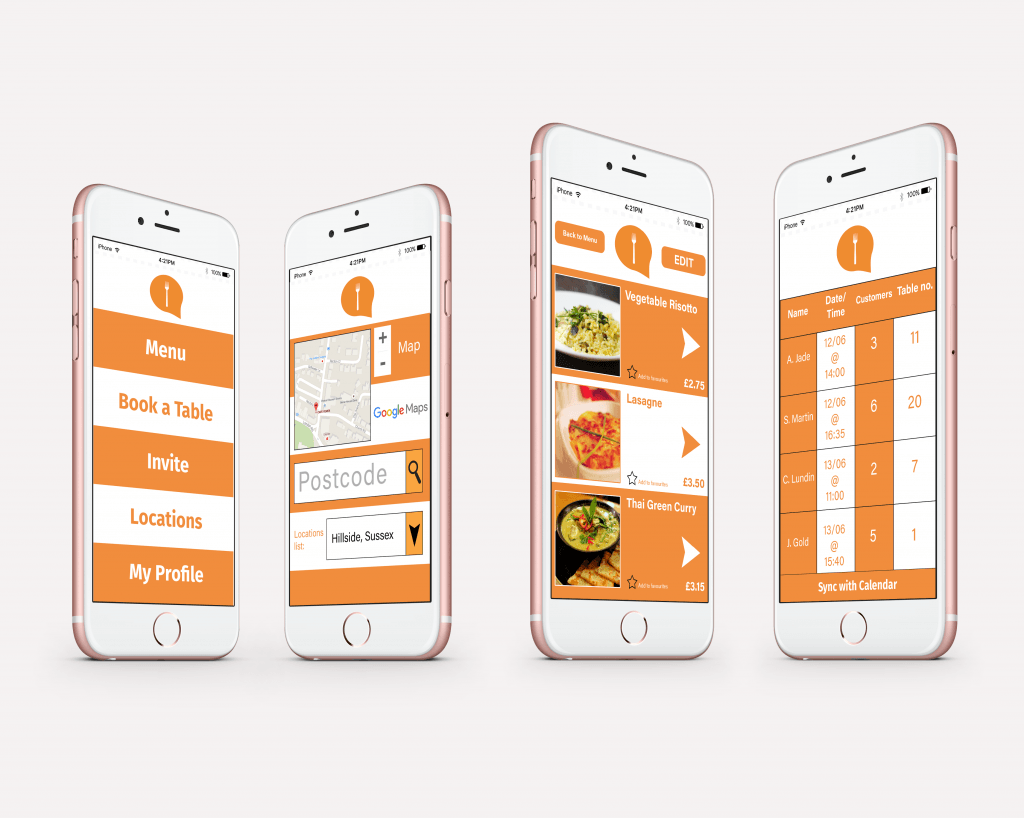
I have also chosen this iPhone template as this angle makes each screen clearer to the audience. On the ‘Locations’ page I have also cut out the description text as this was too small and detailed to display on such a small area. Knowing that my target audience would already have some familiarity with this concept before, the decision was made to put the word ‘Postcode’ in the search bar (which would disappear when text is entered)- this would be made obvious by the search icon (magnifying glass), allowing the user to then search for their nearest Eat & Greet restaurant.

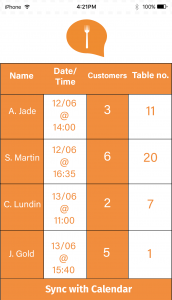
The very right image is a display of the ‘View Bookings’ section of the Establishment version- the only addition to this is the black lines separating each booking section. I felt that this would make each booking easier to read for the user if it were displayed in this manner, rather than my previous version which had no lines to separate them.


Mobile App Design

welcome page_phone

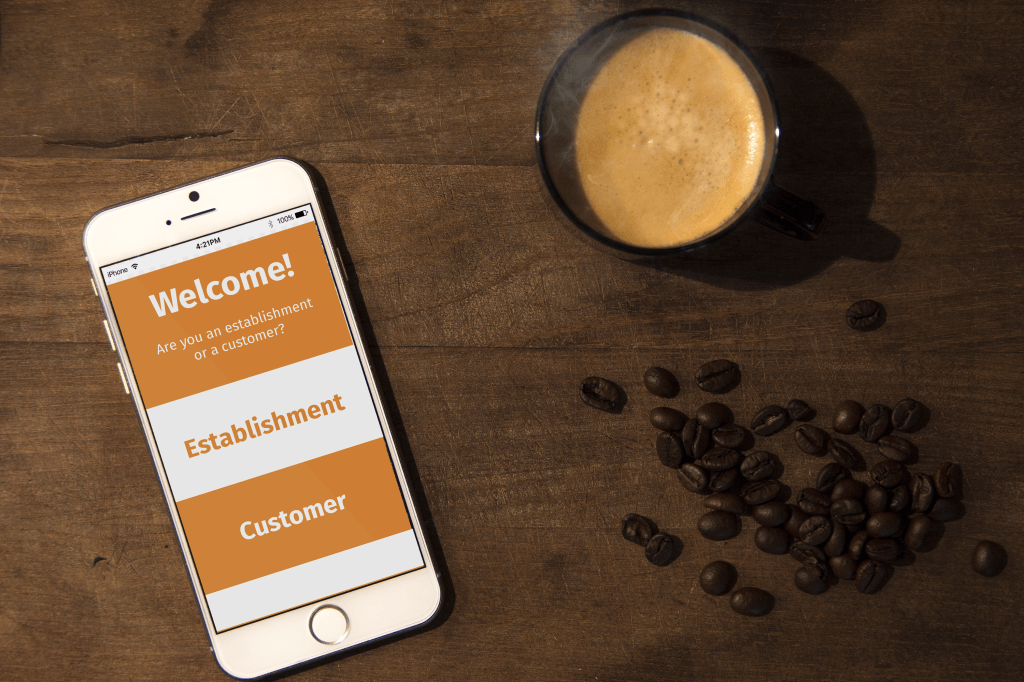
Welcome Page for the app

After having created the Wireframes for my mobile application, I then took these templates and created several designs in Photoshop, as shown below.

Customer version
ALL screens app

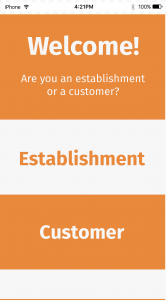
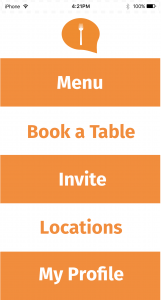
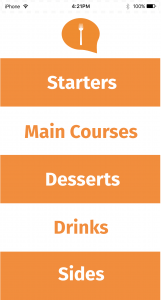
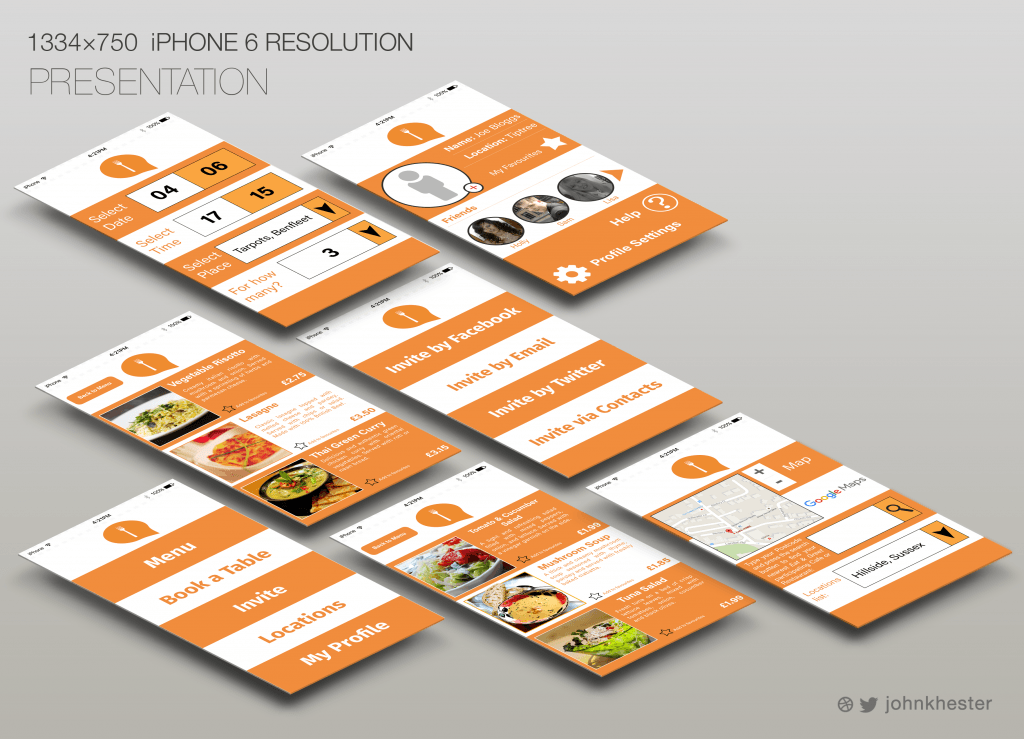
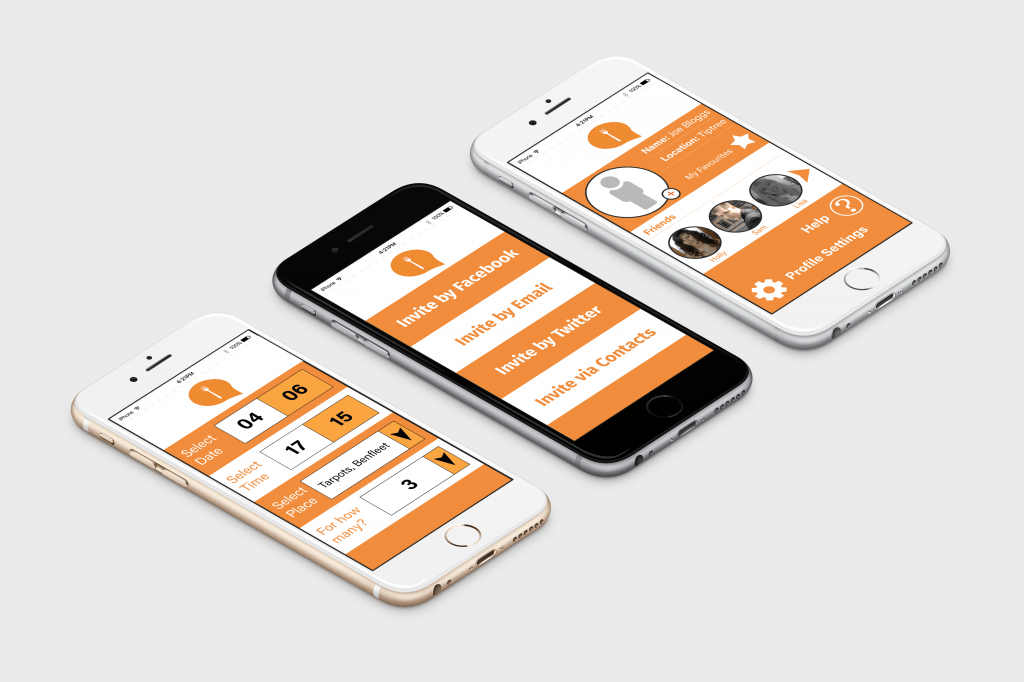
Using this iPhone 6 template, I have placed my designs individually so that it is easy to visualise what each screen looks like. Here are shown the most important pages which show the context and overall layout of the app, including sub-menus for Starters and Main Courses. The booking system, ‘Invite’ page and User Profile pages are also displayed. This is the version that will be shown to customers who are using the app. Some other examples using different iPhone templates are shown below:
3 screen example

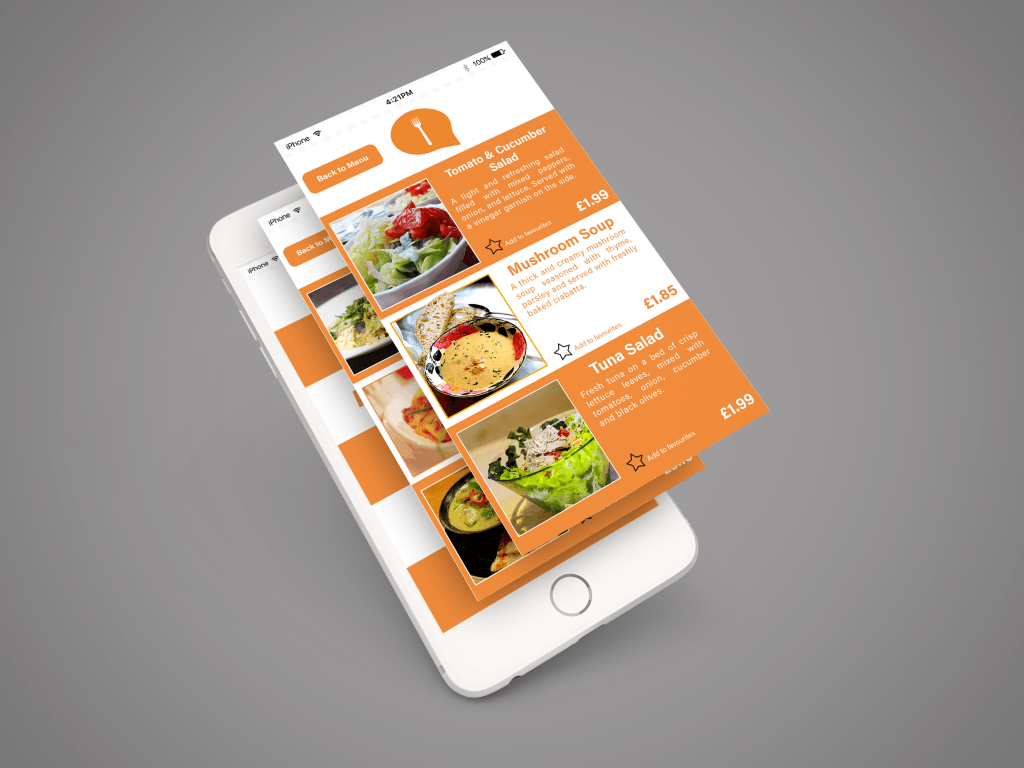
Menu screens layered

Flat images:

customer menu page      customer locations page     my profile page


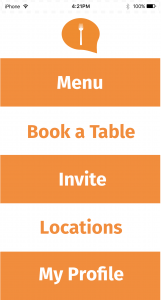
Considering my research into colour and layout, I had decided to go with the colour orange as it is energetic and eye-catching. After discussing with one of the end-users they said that they did not like the tone/shade of orange as it seemed dull and uninteresting. This would be something to consider if I were to re-design this. The alternating colours of white and orange were used to separate each section in order for the design to be clear and simple to understand. The research I did heavily influenced the layout of the mobile app, hence the ‘ladder’ structure of the text. Without any mouse or scroll-bar on a mobile device it was important that each section was big enough and clear enough that it could be selected on the touch-screen of a smartphone or tablet. Due to the small screen size, it was important that the logo (without the text) was always displayed at the top of the screen so that the user could easily navigate back to the main page.

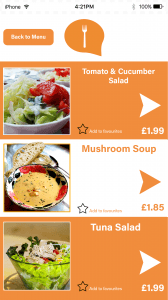
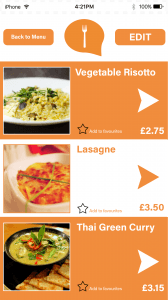
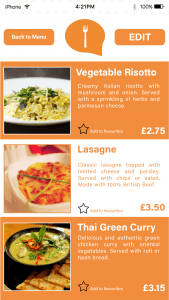
For the menu pages, I felt that it was necessary to have small images of each menu item so that it would give an idea as to what to expect before ordering. A small description is situated to the right of the image in order to reflect the design of a physical paper menu. I had taken into consideration that unlike Android devices, iPhones do not have a built-in ‘back’ button, therefore the decision to add a small ‘back to Menu’ button was necessary. For pages that only have one screen, the logo at the top would suffice in taking the user back to the main page. A star icon which can be tapped would add that particular item to the user’s favourites, so they can refer back to this in future if it is something they wish to order again.

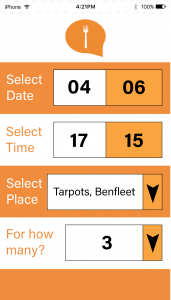
The ‘Book a Place’ page was made as simple as possible for the user so that it would save time and effort to book a table. The drop-down arrows would bring up a ‘pop-up’ box which would allow the user to select the value needed- this is commonly done on most mobile apps. Once all values are selected the device would then display a message asking the user if they are ready to move on to the next page- this is so that they can enter their personal details before finally confirming their booking.

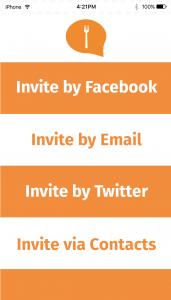
The ‘Invite’ page was a key factor which I needed in order to fulfill the project’s purpose which I had made in my proposal. The links to various social media sites (with the option of inviting users off of the website/app itself) would help to integrate the social and community feature which would make the project stand-out from others. As Facebook and Twitter are so commonly used by members of the target audience it was necessary for the app to have a built-in feature which would automatically send out an invite using the user’s social media profiles. The email option is also there as a consideration of those who may not have a social media account or who may feel uncomfortable using it.

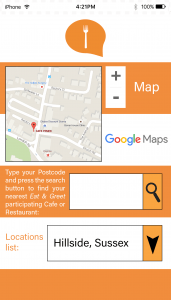
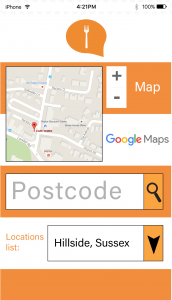
The ‘Locations’ page would allow the user to see all the locations of their local Eat & Greet cafes/restaurants by simply entering their postcode. An integrated Google Map feature was used so that the address could be easily found- this would also display the address of the location selected from the drop-down menu.

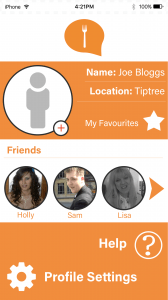
Finally, the ‘My Profile’ page was created so that the user could have a place to store their ‘Friends/Contacts’ for multiple reasons- to add a more personal touch, to allow the ‘Invite by Contacts’ page to function and also to allow the user to see their favourite menu items. There is a help section for FAQs as well as Profile Settings, which would allow for personal information to be changed and a user to log in/log out. The arrow to the right of the page is there so that the user can scroll through their list of friends. Their friend’s profiles can also be brought up when their icon is pressed.

Establishment version
ALL screens app establishment

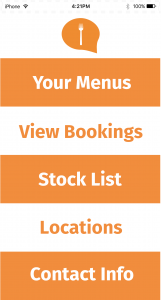
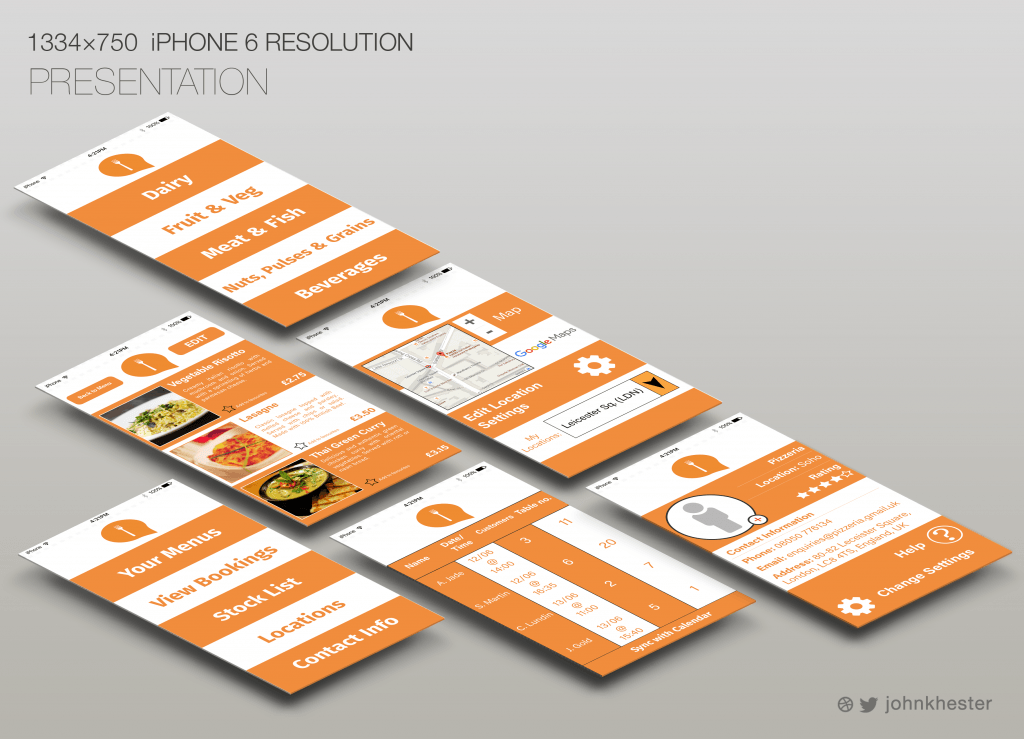
Similarly to the Customer version, I had created a design for the Establishment (Cafe/Restaurant owner). This was necessary in order to fit the theme and aim of my project, as both end users would need to have control over the app’s functions. However, this version differs in the way that some screens have been altered for different purposes that the customer would have no use for.

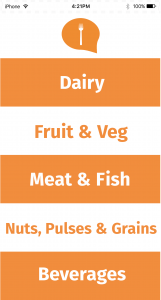
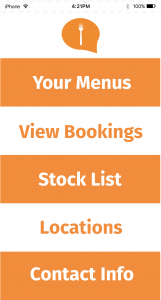
Although the layout is consistent, the ‘Invite’ page has been changed to a Stock List in order for the Owner to see what products they have remaining to make meals from. The following menu is split into categories of food so it is more efficient for the user to keep track of their stock- and can then use listed surplus ingredients to make their menus.

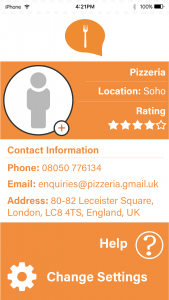
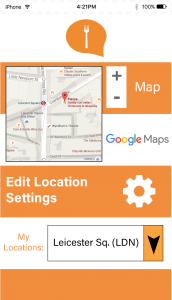
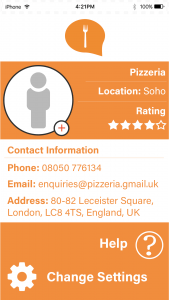
The Menu pages (only one shown in this example) have an ‘Edit’ option so that the user can choose what meals they will be serving. The Bookings page is different so that the Owner can see what customers to expect, as well as the Locations page with the option to edit the address if the Owner has more than one Restaurant, for example (or has changed address). Finally the ‘Profile’ page serves as a generic information page with the Cafe/Restaurant name, rating and contact information. Some clearer examples are shown below:
establishment menu page     establishment menu page 1     establishment contact info

iPhone 6 template source: https://colorlib.com/wp/free-psd-iphone-6-mockup-templates/